
Cricut Tutorials for beginner
Custom Water Bottles with Cricut


Making custom water bottles with your Cricut machine is a rite of passage for any Cricut crafter. Not only are they so easy to make, the opportunities are endless to put your creative touch on something you use every day. You’ll want to gift these to everyone you know!
All you need to make these Cricut water bottles are your Cricut cutting machine and some vinyl, plus a couple of tools you probably already have on hand.
Before you start, make sure your bottles are thoroughly washed and dried.
Let’s get into it…
First off, I measured my water bottle to determine how big my design would need to be. If you don’t have a measuring tape available, you can always use a sheet of paper. Simply wrap the paper around the bottle. With a ruler, measure the distance between the end of the paper.
Next, choosing a beautiful design that you can apply to your water bottle.

Prepare to cut - Uploading design into Cricut Design Space:
- Clicking on “New Project”.
- Select “Upload on” the design panel to the left of the Canvas. To upload, select “Upload Image”.
- Select “Browse” to open the file selector and locate the file you want to use from your computer. Then select “Upload”.
- You will return to the Upload screen. The new image will appear in the Uploaded Images Library at the bottom of the screen. Clicking on the image to select it, then select Insert Images to add it to your design screen.
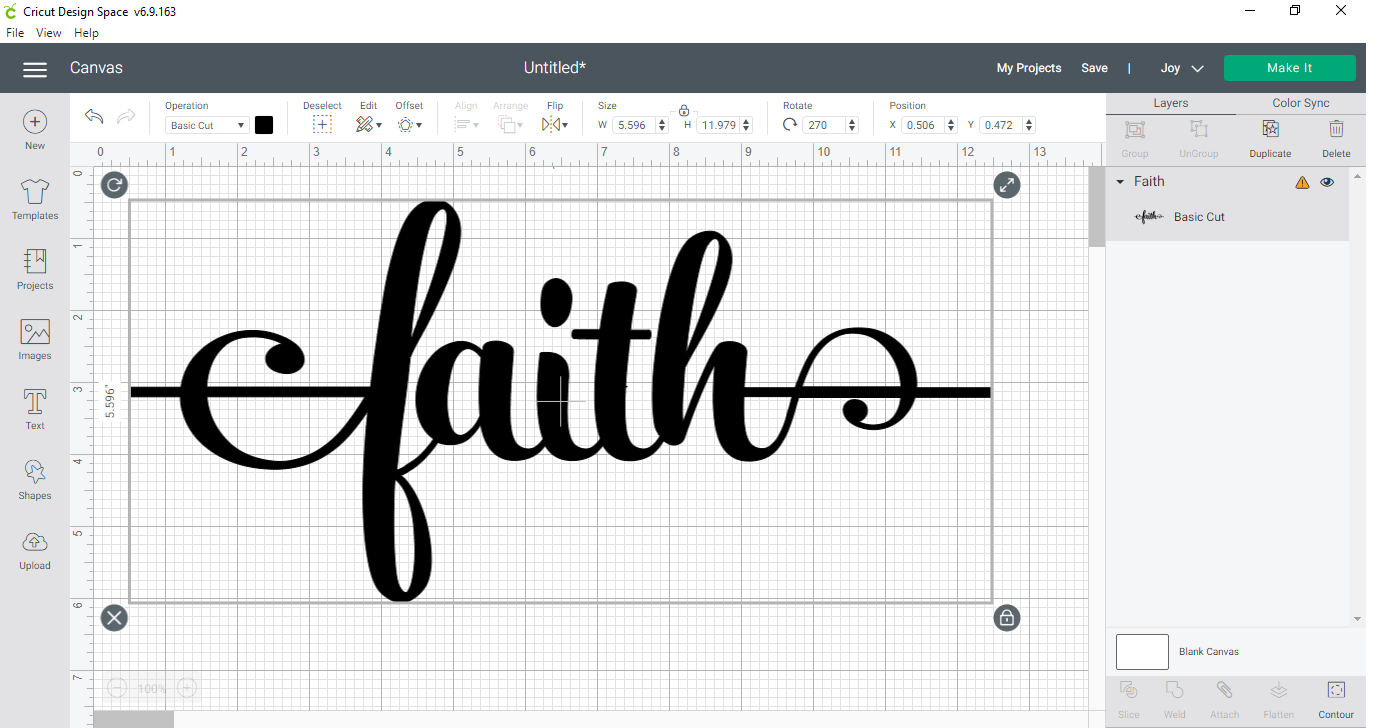
- Don’t forget to resize the image to fit. Click the “Make it” button. You’ll then see a preview of where the Maker will cut the vinyl on the mat. If you need to move it for some reason this is the time to do it. Click “Continue”.
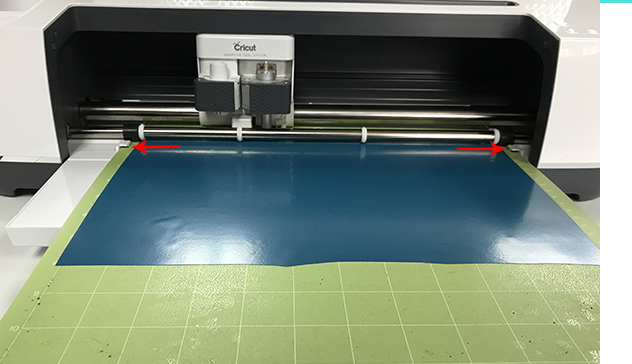
- Select your material, for the water bottles you will use vinyl.
- Then you’ll be prompted to load your blade and then load the mat into the machine.
- When you’re all ready to go hit the “Go” button on your Cricut Maker.
Time to weed the design:
Once you have your pieces cut on the Cricut, cut a square around your cut out design. Peel off the outside vinyl around the design.
Use your weeder (the thing with the bent pointy end) to weed out the extra bits of vinyl within the letters.
I find that the weeding tool really helps with small, intricate designs.
Apply transfer tape & apply vinyl to bottle:
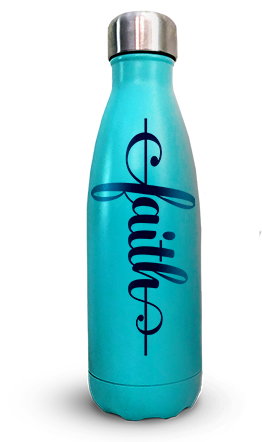
Cut a piece of transfer tape to just slightly larger than your design. Peel the transfer tape off of the paper backing and then press it onto the front of your design. Use the scraper tool to really smooth and press it down.
Be sure to smooth it down really well over your design. Then peel the transfer tape off of the paper and the design should now be attached to it.
Now use your tape to press it onto the water bottle. Smooth the design down and then peel away the transfer tape.
Until next time, Happy Crafting!

Love this ifea